Monday, April 26, 2021

Get Extroot working on TP-Link TL-WDR4300 v1 with OpenWRT 18.06.2, 21.02.0 rc1

Update 2021/04/25: Also works on 21.02.0 rc1


This is just a quick copy paste way for me to remember in the future how I got my Extroot working using SSH putty
Note: This works on all 17.01 and so far up to 18.06.2 and now 21.02.0 rc1 (newest version at time of writing)


First "What is Extroot"

Extroot works by setting another overlay partition in the external storage device, and during boot this new overlay partition will be mounted over the internal storage's overlay partition. This approach allows easy fallback in case the external storage device is removed, as your device will still have its own overlay partition and thus will load all configuration from there.
Which means that it will behave exactly the same as just before you set up extroot. 


What packages do I need to install

Before you do anything else make sure you have the proper packages,  You can run these commands and don't worry if you have them already nothing will break.

Note: If you build your own firmware like I do using Chef Imagebuilder just add them, Links at bottom of page for imagebuilder.

Copy all of the highlighted text and paste it into SSH (putty)

opkg update && opkg install block-mount curl e2fsprogs fdisk kmod-fs-ext4 kmod-usb-ohci kmod-usb-storage kmod-usb-uhci nano

  If you reboot your router you will have to do opkg update again if you need to add more packages

Just copy paste one highlighted command at a time


 Attach USB stick to the router, If you have more than one stick in the router I would suggest running "block info" before and after inserting the stick and make note of the changing "sda" device name


block info 

mount /dev/sda1 /mnt ; tar -C /overlay -cvf - . | tar -C /mnt -xf - ; umount /mnt


block detect > /etc/config/fstab; \

sed -i s/option$'\t'enabled$'\t'\'0\'/option$'\t'enabled$'\t'\'1\'/ /etc/config/fstab; \

sed -i s#/mnt/sda1#/overlay# /etc/config/fstab; \

cat /etc/config/fstab;

Last thing to do is reboot then check if you got more space on your router
reboot

df -h 

Just remember one line at a time, don't think about how weird it looks just do it.


Here is a pick, you will see what I mean when I say it looks weird

Note the > after the "block detect" command.


Check for more space


Build your own firmware the easy way.
Chef Imagebuilder 
https://github.com/libremesh/chef
https://github.com/aparcar/attendedsysupgrade-server

Sunday, April 25, 2021

OpenWrt 21.02.0 rc1 integrated bandwidth monitoring per client Install luci-wrtbwmon and wrtbwmon :Updated 04/25/2021

TP-Link TL-WDR4300 v1 OpenWrt 22.03
Install luci-wrtbwmon and wrtbwmon on OpenWrt
Updated 12/10/2022

Update: 12/10/2022 Still working
Update: 4/25/2021 Changed download link's working on 21.02 rc1
Update: 3/12/2019 this seems to be broken in the 18.06.0 - .1 -.2 firmware
Update: This also works on 17.01.4  

I wrote this for myself mostly for future reference, I wanted to monitor in real time the traffic that was flowing thru my router.


 After connecting with PuTTY using SSH I used these commands. 

opkg update


 opkg install wrtbwmon_0.37_ipv6_all.ipk
 
opkg install luci-wrtbwmon_v0.8.3_all.ipk


 /etc/init.d/wrtbwmon enable

/etc/init.d/wrtbwmon start


Not sure if it's necessary but due to errors in luci I installed this (Configuration and User file were not displayed properly)
 
This is necessary 
opkg install luci-compat
 
I had to reboot:
reboot


 Then in a web browser open LEDE, Default IP is 192.168.1.1
Navigate to Network > Usage


 And select Configuration then  Persist database (Install luci-compat if this looks different)
 
Press Save & Apply


  Then Navigate to Network >Usage > User File -- if you want to label names for unknown Hosts, Usually DHCP and DNS takes care of this. (Install luci-compat if this looks different)
 

 Press Submit when done
 
 If it works delete the downloaded packages as they are no longer needed
make sure no other ipk's are there that you may want to keep with ls:

 rm -r *.ipk  
 Note: You can also use the hosts file to name hosts
If you do not use DHCP and your computers have static IP's instead of showing MAC address you could write the computer names to LEDE's hosts file and put the computer names there, The pic at the top of the page show's the computer names because of this (##1). The other pic (##2) shows without.

I use ssh and nano so here are the commands:

opkg update && opkg install nano
 nano /etc/hosts

add the computer names in this format, Do not delete anything just add the computer names.
192.168.200.99 Computer1
192.168.200.101 Computer2
192.168.200.103 Computer3


Links:

Some of the pictures probably got screwed up because i don't think blogger has a cancel button


Wednesday, February 21, 2018

Create a Ubuntu VM for PiHole


This is a work in process and not finished yet, Just mostly pic's and some may be out of order i'm still working on it.


Over the years I have created several Virtual machines using VMware Workstation, Currently I am using Workstation version 14.1.1

Download ISO
This is a link to the version of Ubuntu that I use, There are probably lighter versions but I find this one ends up being about 1.7 gig which is acceptable to me.

Ubuntu web site


I typically download the torrent version, My internet connection is not the best in the world and when  my network goes down torrents will resume downloading without the need of me being there to start the download process again when it gets back online.


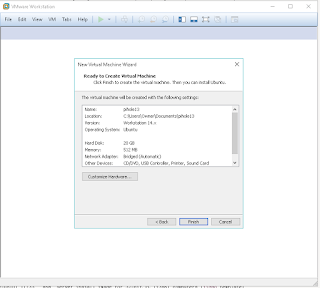
Open VMware Workstation then go to File > New Virtual Machine and select Custom.


Choose your hardware compatibility

Select I will install the operating system later

Select Linux
In the drop-down list I selected Ubuntu, In my case I used a 32 bit ISO if I used the 64 bit version I would have selected Ubuntu 64

Give your VM a name and a location to store it

Tip:
Have a separate drive to store it on, Do not store it on the same drive as the host.


Select English

Before pressing enter key

Press the F4 key

Select Install a minimal virtual machine

Press the Enter key


Don't bother detecting the keyboard


Enable the SSH server


Don't forget to find your IP before trying to SSH into your sever

ifconfig | grep inet


Setup Putty


I usually try to give my VM's a physical Lan card

Remove all Check boxes except the VMware one in the Lan cards properties

Set the time

There are several way's to set the time to your timezone, Take your pick.


sudo timedatectl set-timezone EST


timedatectl list-timezones
sudo timedatectl set-timezone America/Toronto


sudo dpkg-reconfigure tzdata


I use 7zip to compress the VM as a backup before installing software just encase something screws up, It gives me a quick way to start over.


Installing Pihole using SSH


Installing PiHole goes way to fast to take pic's of each step so I made a video 

curl -sSL https://install.pi-hole.net | bash

Set the password at the end

pihole -a -p set_password

If the video above does not work for some reason try one of these links:
https://www.youtube.com/watch?v=sichPLv8vLg&feature=youtu.be
https://youtu.be/sichPLv8vLg